Nav Social Menu

    • Amazon
    • Email
    • Facebook
    • Instagram
    • TikTok

My Mini Adventurer

Jello Shots, Recipes and Fun!

  • About
    • About Me
    • Seen and Heard
    • Privacy Policy/Cookies
  • Travel
    • USA
      • Florida
      • Philadelphia
      • New England
      • Other USA Locations
    • Disney
    • Cruise
    • Europe
      • Austria
      • France
      • Germany
      • Italy
      • Spain
      • Switzerland
      • UK
  • Shots
    • Christmas Shots
    • All Jello Shots
    • Summer Themed Shots
    • Wizard Themed Shots
    • Epcot Themed Shots
    • Halloween Jello Shots
  • Recipes
    • Mini Chef Mondays
  • Kids & Family
    • Color Weeks
    • Kids Activities
    • Holidays
    • Pregnancy Journal

Hanukkah Gelt Cookies!

16 shares
  • Share
  • Tweet

Hanukkah started this week and we kicked it off with a dinner of brisket and latkes as well as lighting the first candle last night!  We also made these delicious cookies to go with our Hanukkah celebrations.  I decided instead of making dreidel shaped cookies, to go with something a little different and make cookies that resemble gelt!  Gelt is the real money or chocolate coins that children receive on Hanukkah, which can also be used to play the dreidel game! The cookies are delicious and oh-so-easy to make! The secret is using store bought plain cookies so all that there is for the kids to do is decorate.
Hanukkah Gelt Cookies

What you need:

  • 1 package of circle shaped cookies, store bought or homemade
  • 1 cup of powdered sugar
  • about 3 tablespoons milk
  • gold sprinkles
  • Optional: gold or yellow food coloring for the icing
What to do:
1. Place the cookies out on a sheet of parchment paper, wax paper or similar.
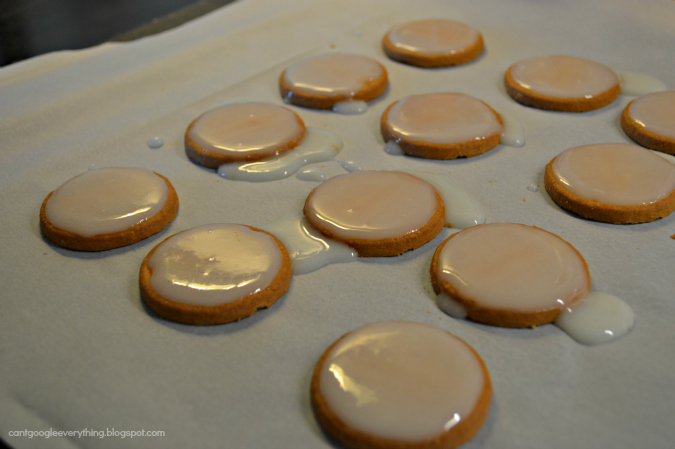
2. Mix the icing- 1 cup of powdered sugar and 3 tablespoons of milk.  Add another 1/2 tablespoon+ if you think the icing is too thick.  Optional: add the food coloring, just 1-2 drops is enough!
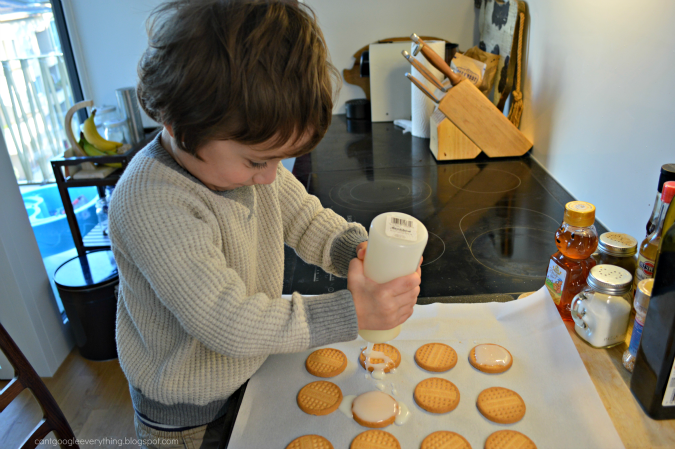
3. Put the icing in a piping bag, plastic baggy (cut off the corner to make a tip) or squeeze bottle. I prefer the squeeze bottle because it’s so easy for my son to use.

5. Ice the cookies!  My son absolutely loved this step, but needed a lot of guidance.  If not for me, he would have squeezed all the icing onto one cookie!
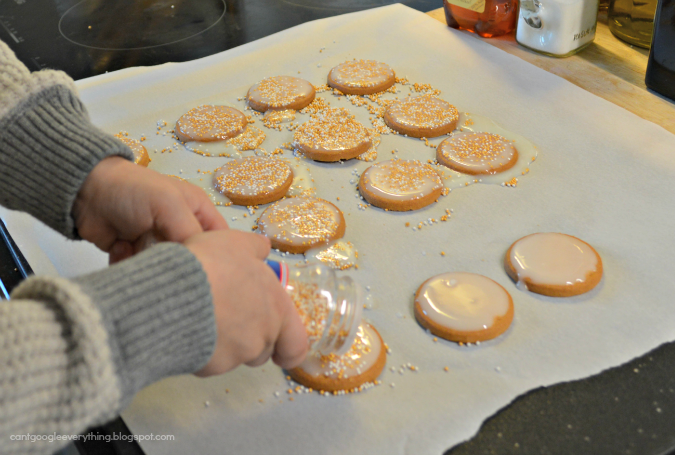
6. Decorate with sprinkles!  Allow the icing to set a little before eating or storing, as the icing can run a little until it’s set.  Once it’s totally set and dry you can stack the cookies to store them in an air tight container (or just eat them all).

Enjoy!

I am hosting Mini Chef Mondays along with 11 fabulous bloggers!

Be sure to check out each of their Mini Chef posts as well. We would love it if you would share your Mini Chef posts with us each week, too! Follow along socially and join in on the fun by using our hashtag #MiniChefMondays to share creations your mini chef created in the kitchen. Additionally, if you have a kid-friendly recipe that kids can easily recreate link up! Don’t have a blog? Share the URL of your instagram photo in our linky below.

  1. Christmas Tree Holiday Brownies // Courtney’s Sweets
  2. Applesauce Cinnamon Ornaments // Momma Lew
  3. Chocolate Covered Peanut Butter Balls // Baby Loving Mama
  4. Christmas Inspired Rice Krispie Treats // We’re Parents
  5. Creamy & Crunchy Chicken Crescents // Frugal Novice
  6. Asian Pork Belly Bean Soup Recipe // Eating Richly
  7. Grinch Green Hot Chocolate // Giggles, Gobbles and Gulps
  8. Pizza Burger Sliders // Step Stool Chef
  9. Cheese Blintzes with Strawberry Sauce Like Your Grandmother Made // Vegging at the Shore
  10. Gourmet Potatoes // Mom’s Messy Miracles
  11. Gingerbread Pancakes // O’Boy! Organic
  12. Hanukkah Gelt Cookies! // Can’t Google Everything

An InLinkz Link-up

#mc_embed_signup{background:#fff; clear:left; font:14px Helvetica,Arial,sans-serif; }

Did you enjoy this post? Sign up for my newsletter!

Tweet
Share
Share
Pin

You may also like

Do you have questions about this recipe?
Feel free to send me an email and say hi!

Previous Post: « Snowman Oreos!
Next Post: Santa Crafts for Kids Round Up! »

Primary Sidebar

Check out more kids cooking posts here!

Recently Popular Posts

  • Black Widow Jello Shots
    Black Widow Jello Shots
  • Old Fashioned Jello Shots
    Old Fashioned Jello Shots
  • Witches Brew Syringe Jello Shots
    Witches Brew Syringe Jello Shots
  • Spooky Graveyard Dirt Pudding Shots
    Spooky Graveyard Dirt Pudding Shots
  • The Best Homemade Boozy Gummy Bears
    The Best Homemade Boozy Gummy Bears

Footer

Ciao!

Insta Adventures

Cheers to Team USA! On to the next round! (Shot re Cheers to Team USA! On to the next round! (Shot recipe in my earlier reel or in my website!) #teamusa #worldcup #usaπŸ‡ΊπŸ‡Έ #jelloshots #redwhiteblue
Do you prefer garnish or no on your jello shots? # Do you prefer garnish or no on your jello shots? #jelloshots #finishingsugar #mccormick #4thofjuly #redwhiteblue
Limoncello margarita shots πŸ‹ These shots are ze Limoncello margarita shots
πŸ‹ These shots are zesty and refreshing! Perfect for summer! #jelloshots #limoncello #margarita #summervibesβ˜€οΈ 

Recipe:
πŸ‹ 1 cup boiling water
πŸ‹ A 3-ounce package lemon jello or similar gelatin dessert mix 
πŸ‹ 1/2 cup tequila 
πŸ‹ 1/2 cup limoncello
πŸ‹ shot syringes or shot cups 

Mix boiling water with lemon jello and stir until fully dissolved. Add alcohols and stir. Divide between syringes and transfer to fridge to set, about four hours. Don’t forget to put the caps on the syringes!

πŸ‹ Makes 12-15 shots depending on the size syringes/cups you use! (The ones in the video are 1.5 ounce ez-inject syringes)

Cheers!
It’s time for red, white and blue shots!! Perfec It’s time for red, white and blue shots!! Perfect for the 4th of July and watching Team USA in the World Cup! This new version is also dairy free! #jelloshots #4thofjuly #worldcup2026 #teamusa #jelloshotsfordays
β€οΈπŸ€πŸ’™β€οΈπŸ€πŸ’™
Recipe: (makes 28-30 shots)
❀️ 2 cups of water and 3 cups vodka, divided 
🀍 3-ounce boxes jello mix in blue and red (I used cherry)
πŸ’™ 1 cup white Gatorade 
❀️ 1 packet Knox gelatin 
🀍 white food coloring 3-5 drops, or as desired 
πŸ’™ ez squeeze shot cups

Make it!
πŸ’™make the blue layer- mix 1 cup boiling water with blue jello. Add 1 cup vodka. Divide between shot cups, transfer to fridge to set, at least a few hours. 
🀍make white layer- pour 1 cup Gatorade into saucepan. Sprinkle Knox over liquid and let it bloom for a minute. Turn on heat and bring to just a boil, stirring a little. Remove from heat and add 1 cup vodka. Add food coloring if desired! Divide between shot cups and return to fridge to set. 
❀️ make red layer- repeat steps from blue, but with red jello! Transfer to fridge to set before serving. 

Be sure to let each layer fully set before adding the next one! Cheers!
🌈 Rainbow shots are perfect for pride month! St 🌈 Rainbow shots are perfect for pride month! Start with purple and then work your way up through the rainbow, ending with red as the top layer. I added a drop of white food coloring to every other color to make the layers pop and change the hue a little, but this is optional! Be sure to let each layer set before going on to the next. #jelloshots #pride #rainbow #jellyshots 

Basic recipe: (makes 25-28 shots depending on how full you make them)
🌈 1/2 cup water and 1/2 cup vodka for each layer 
🌈 A 3-ounce box jello mix in each color of the rainbow

🌈 For each layer: mix 1/2 cup hot water with jello mix, stirring well until dissolved. Add 1/2 cup vodka. Divide between shot cups, just a little in each cup. Set in fridge for a few hours before starting the next layer

🌈 Link in bio for full recipe!!
What color are these shots? 😎 #jelloshots #intu What color are these shots? 😎 #jelloshots #intuitiontest
Follow on Instagram

Search

Archives

Categories

Privacy Policy

http://myminiadventurer.com/privacy-policycookies

Copyright My Mini Adventurer © 2026 Β· Sprinkle Pro Theme

16 shares
We use cookies to ensure that we give you the best experience on our website. If you continue to use this site we will assume that you are happy with it.Accept!Privacy Policy