Nav Social Menu

    • Amazon
    • Email
    • Facebook
    • Instagram
    • TikTok

My Mini Adventurer

Jello Shots, Recipes and Fun!

  • About
    • About Me
    • Seen and Heard
    • Privacy Policy/Cookies
  • Travel
    • USA
      • Florida
      • Philadelphia
      • New England
      • Other USA Locations
    • Disney
    • Cruise
    • Europe
      • Austria
      • France
      • Germany
      • Italy
      • Spain
      • Switzerland
      • UK
  • Shots
    • Christmas Shots
    • All Jello Shots
    • Summer Themed Shots
    • Wizard Themed Shots
    • Epcot Themed Shots
    • Halloween Jello Shots
  • Recipes
    • Mini Chef Mondays
  • Kids & Family
    • Color Weeks
    • Kids Activities
    • Holidays
    • Pregnancy Journal

Disney Baby Nursery Gift Basket!

12 shares
  • Share
  • Tweet

This shop has been compensated by Collective Bias, Inc. and its advertiser. All opinions are mine alone. #MagicBabyMoments #CollectiveBias
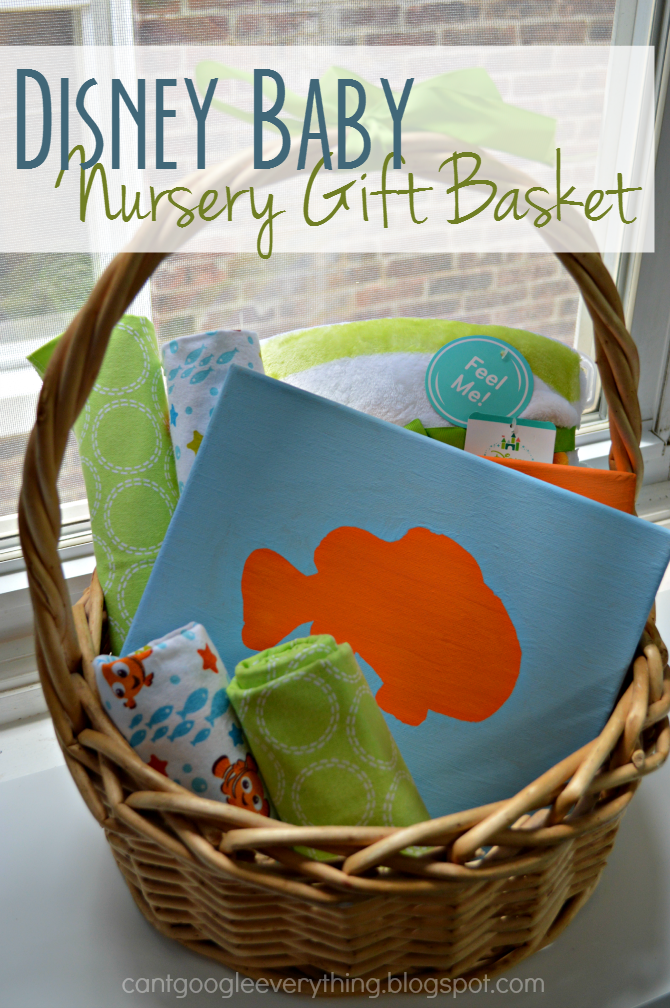
Recently my friend Nikki told me she was expecting her second baby this fall!  Even though a lot of people don’t have showers for their second baby, I still think it’s nice to give a little gift!  She already has plenty of baby things, but it’s also great to have a little nursery update and freshen things up for the next baby!
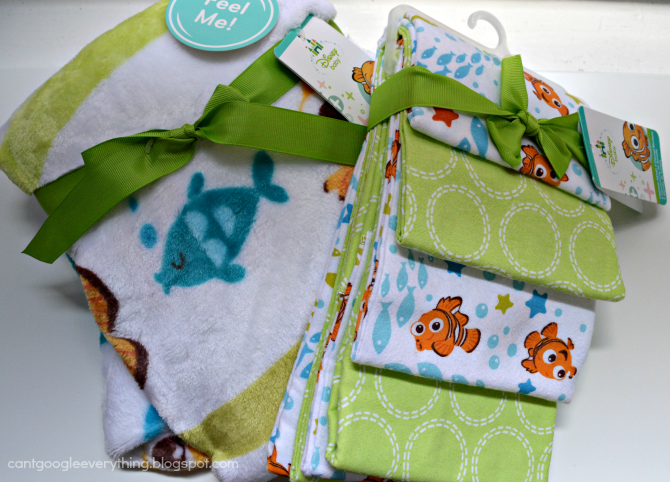
I picked up these cute Disney Baby Finding Nemo baby blankets, a perfect gender neutral baby gift!  I wanted to make a little gift basket for her so I went ahead and created some fun wall art to go along with the Finding Nemo theme from the blankets.

You can really make this wall art with any theme!  For example, if you wanted to do a Cinderella nursery you could do a castle outline and the saying “A Dream is a Wish Your Heart Makes.”

You will need:
-2 small blank white canvases
-at least two paint colors
-paint brushes
-stickers in the font you want
-a fish cut out* (or other shape you want)

*I printed the fish out on regular printer paper and cut the fish out.
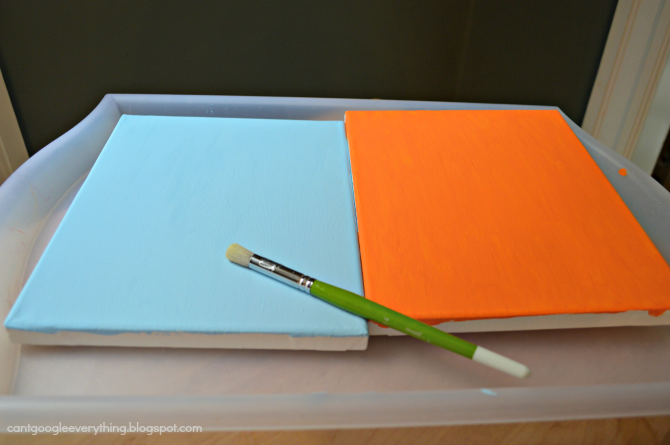
Step 1: Paint your canvasses.  You don’t have to paint the wrap around sides at this point because you will just do it later with the second coat.  This first layer is the color that will “show through” in your artwork.
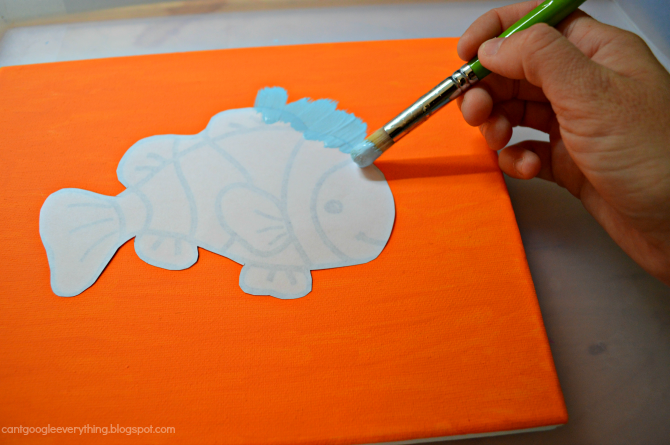
For the fish shape:

Step 2: After the first color dries, tape the fish cut out down with double sided tape.  Gently paint around the fish, starting each stroke on the paper and pulling it away, so you don’t smudge the paint under the paper.

Step 3: Once the outline is complete, carefully remove the paper cut out and discard.  It will look something like this!  Honestly, I kind of liked it this way and seriously considered leaving it like this!

Finally, step 4 is to paint the rest of the canvas blue so the fish is in the water!  Be sure to paint the wrap around sides of the canvas as well.  This really allows the fish shape to pop!
For the words:
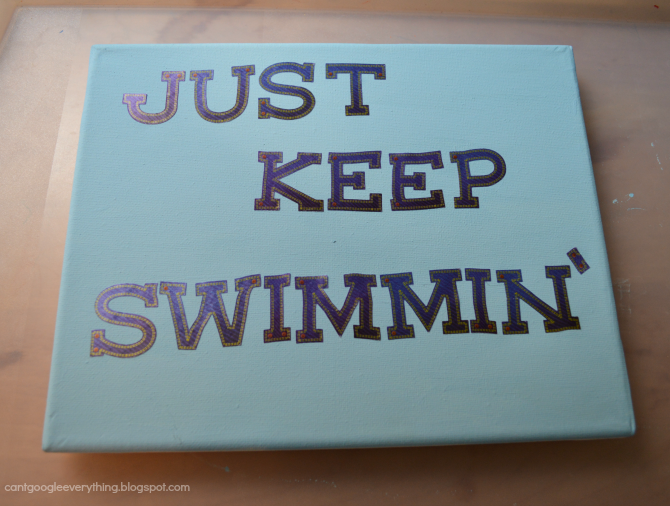
Step 2: Carefully place your stickers with your chosen saying on the dried canvas.  Be sure all the edges are pressed down so no paint sneaks under!

Step 3: Paint your second color on over the stickers and all over the canvas.  You may need a few coats to fully cover the first color, depending on how dark it is!

Step 4: After the paint is dry, carefully peel the stickers off to reveal your quote in the original paint color!

This craft is an easy way to spruce up and personalize your baby’s nursery!  You can customize it with any of the Disney Baby themes, such as Ariel, Cinderella, Monsters Inc, Mickey, Minnie or Lion King Jungle!  Let your imagination run wild or just do a simple cut-out for a minimalist effect!
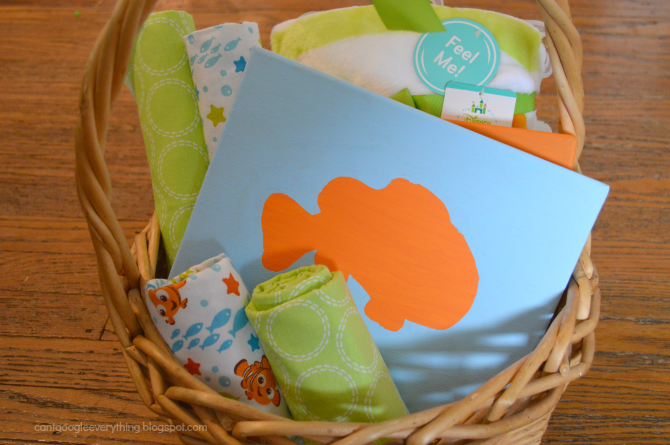
I tucked my artwork into a gift basket along with the Finding Nemo blankets.  I rolled the fleece blankets up in different ways so the basket had a little more depth, and up-cycled the ribbon from the packaging to decorate the basket!  My friend can also use the basket to store toys, diapers or blankets in her new baby’s nursery!

You can find this and other Disney Baby themed nursery items at Walmart in the baby section!  Which one is your favorite?

Thanks for checking out my Disney Baby Nursery Gift Basket and DIY wall art tutorial! What’s your favorite DIY for decorating a nursery?


Tweet
Share
Share
Pin

You may also like

Previous Post: « Peapod Grocery Delivery!
Next Post: Huevos Rancheros with Homemade Rancheros Sauce! »

Primary Sidebar

Recently Popular Posts

  • Old Fashioned Jello Shots
    Old Fashioned Jello Shots
  • Orange Creamsicle Jello Shots
    Orange Creamsicle Jello Shots
  • Watermelon Jello Shots
    Watermelon Jello Shots
  • Black Widow Jello Shots
    Black Widow Jello Shots
  • The Best Homemade Boozy Gummy Bears
    The Best Homemade Boozy Gummy Bears

Footer

Ciao!

Insta Adventures

Cheers to Team USA! On to the next round! (Shot re Cheers to Team USA! On to the next round! (Shot recipe in my earlier reel or in my website!) #teamusa #worldcup #usaπŸ‡ΊπŸ‡Έ #jelloshots #redwhiteblue
Do you prefer garnish or no on your jello shots? # Do you prefer garnish or no on your jello shots? #jelloshots #finishingsugar #mccormick #4thofjuly #redwhiteblue
Limoncello margarita shots πŸ‹ These shots are ze Limoncello margarita shots
πŸ‹ These shots are zesty and refreshing! Perfect for summer! #jelloshots #limoncello #margarita #summervibesβ˜€οΈ 

Recipe:
πŸ‹ 1 cup boiling water
πŸ‹ A 3-ounce package lemon jello or similar gelatin dessert mix 
πŸ‹ 1/2 cup tequila 
πŸ‹ 1/2 cup limoncello
πŸ‹ shot syringes or shot cups 

Mix boiling water with lemon jello and stir until fully dissolved. Add alcohols and stir. Divide between syringes and transfer to fridge to set, about four hours. Don’t forget to put the caps on the syringes!

πŸ‹ Makes 12-15 shots depending on the size syringes/cups you use! (The ones in the video are 1.5 ounce ez-inject syringes)

Cheers!
It’s time for red, white and blue shots!! Perfec It’s time for red, white and blue shots!! Perfect for the 4th of July and watching Team USA in the World Cup! This new version is also dairy free! #jelloshots #4thofjuly #worldcup2026 #teamusa #jelloshotsfordays
β€οΈπŸ€πŸ’™β€οΈπŸ€πŸ’™
Recipe: (makes 28-30 shots)
❀️ 2 cups of water and 3 cups vodka, divided 
🀍 3-ounce boxes jello mix in blue and red (I used cherry)
πŸ’™ 1 cup white Gatorade 
❀️ 1 packet Knox gelatin 
🀍 white food coloring 3-5 drops, or as desired 
πŸ’™ ez squeeze shot cups

Make it!
πŸ’™make the blue layer- mix 1 cup boiling water with blue jello. Add 1 cup vodka. Divide between shot cups, transfer to fridge to set, at least a few hours. 
🀍make white layer- pour 1 cup Gatorade into saucepan. Sprinkle Knox over liquid and let it bloom for a minute. Turn on heat and bring to just a boil, stirring a little. Remove from heat and add 1 cup vodka. Add food coloring if desired! Divide between shot cups and return to fridge to set. 
❀️ make red layer- repeat steps from blue, but with red jello! Transfer to fridge to set before serving. 

Be sure to let each layer fully set before adding the next one! Cheers!
🌈 Rainbow shots are perfect for pride month! St 🌈 Rainbow shots are perfect for pride month! Start with purple and then work your way up through the rainbow, ending with red as the top layer. I added a drop of white food coloring to every other color to make the layers pop and change the hue a little, but this is optional! Be sure to let each layer set before going on to the next. #jelloshots #pride #rainbow #jellyshots 

Basic recipe: (makes 25-28 shots depending on how full you make them)
🌈 1/2 cup water and 1/2 cup vodka for each layer 
🌈 A 3-ounce box jello mix in each color of the rainbow

🌈 For each layer: mix 1/2 cup hot water with jello mix, stirring well until dissolved. Add 1/2 cup vodka. Divide between shot cups, just a little in each cup. Set in fridge for a few hours before starting the next layer

🌈 Link in bio for full recipe!!
What color are these shots? 😎 #jelloshots #intu What color are these shots? 😎 #jelloshots #intuitiontest
Follow on Instagram

Search

Archives

Categories

Privacy Policy

http://myminiadventurer.com/privacy-policycookies

Copyright My Mini Adventurer © 2026 Β· Sprinkle Pro Theme

12 shares
We use cookies to ensure that we give you the best experience on our website. If you continue to use this site we will assume that you are happy with it.Accept!Privacy Policy